In this post, we will teach you how to use the HTML tags of the Pleasepoint one-to-one recommendation SDK.
Here are the contents of the post:
- HTML SDK: Improve your customers' experience.
- Adding the Pleasepoint SDK to the JS scripts loaded by the page.
- One-to-one product recommendations.
- Product recommendations based on another product (item-item).
- Product recommendations based on ranking (ranking one-to-one).
- Recommendations based on bestsellers.
- Recording interaction events.
- Why should you personalize your eCommerce one-to-one with the HTML SDK?
This post is the second in a series of four posts on how to use the Pleasepoint SDK. In this article, we will cover the use of the SDK in HTML. Here are the links to the other three posts:
- The Pleasepoint SDK: One-to-one and real-time personalization of eCommerce interactions.
- SDK JS: Implement one-to-one recommendations using JavaScript.
- API: Implement one-to-one recommendations by directly accessing the API.
HTML SDK: Improve your customers' experience.
Thanks to Pleasepoint's HTML SDK, you can take personalization to the next level by displaying highly personalized product recommendations and tracking your customers' interaction events. In this section, you will learn how to use this powerful tool and why it is essential for the success of your online business.
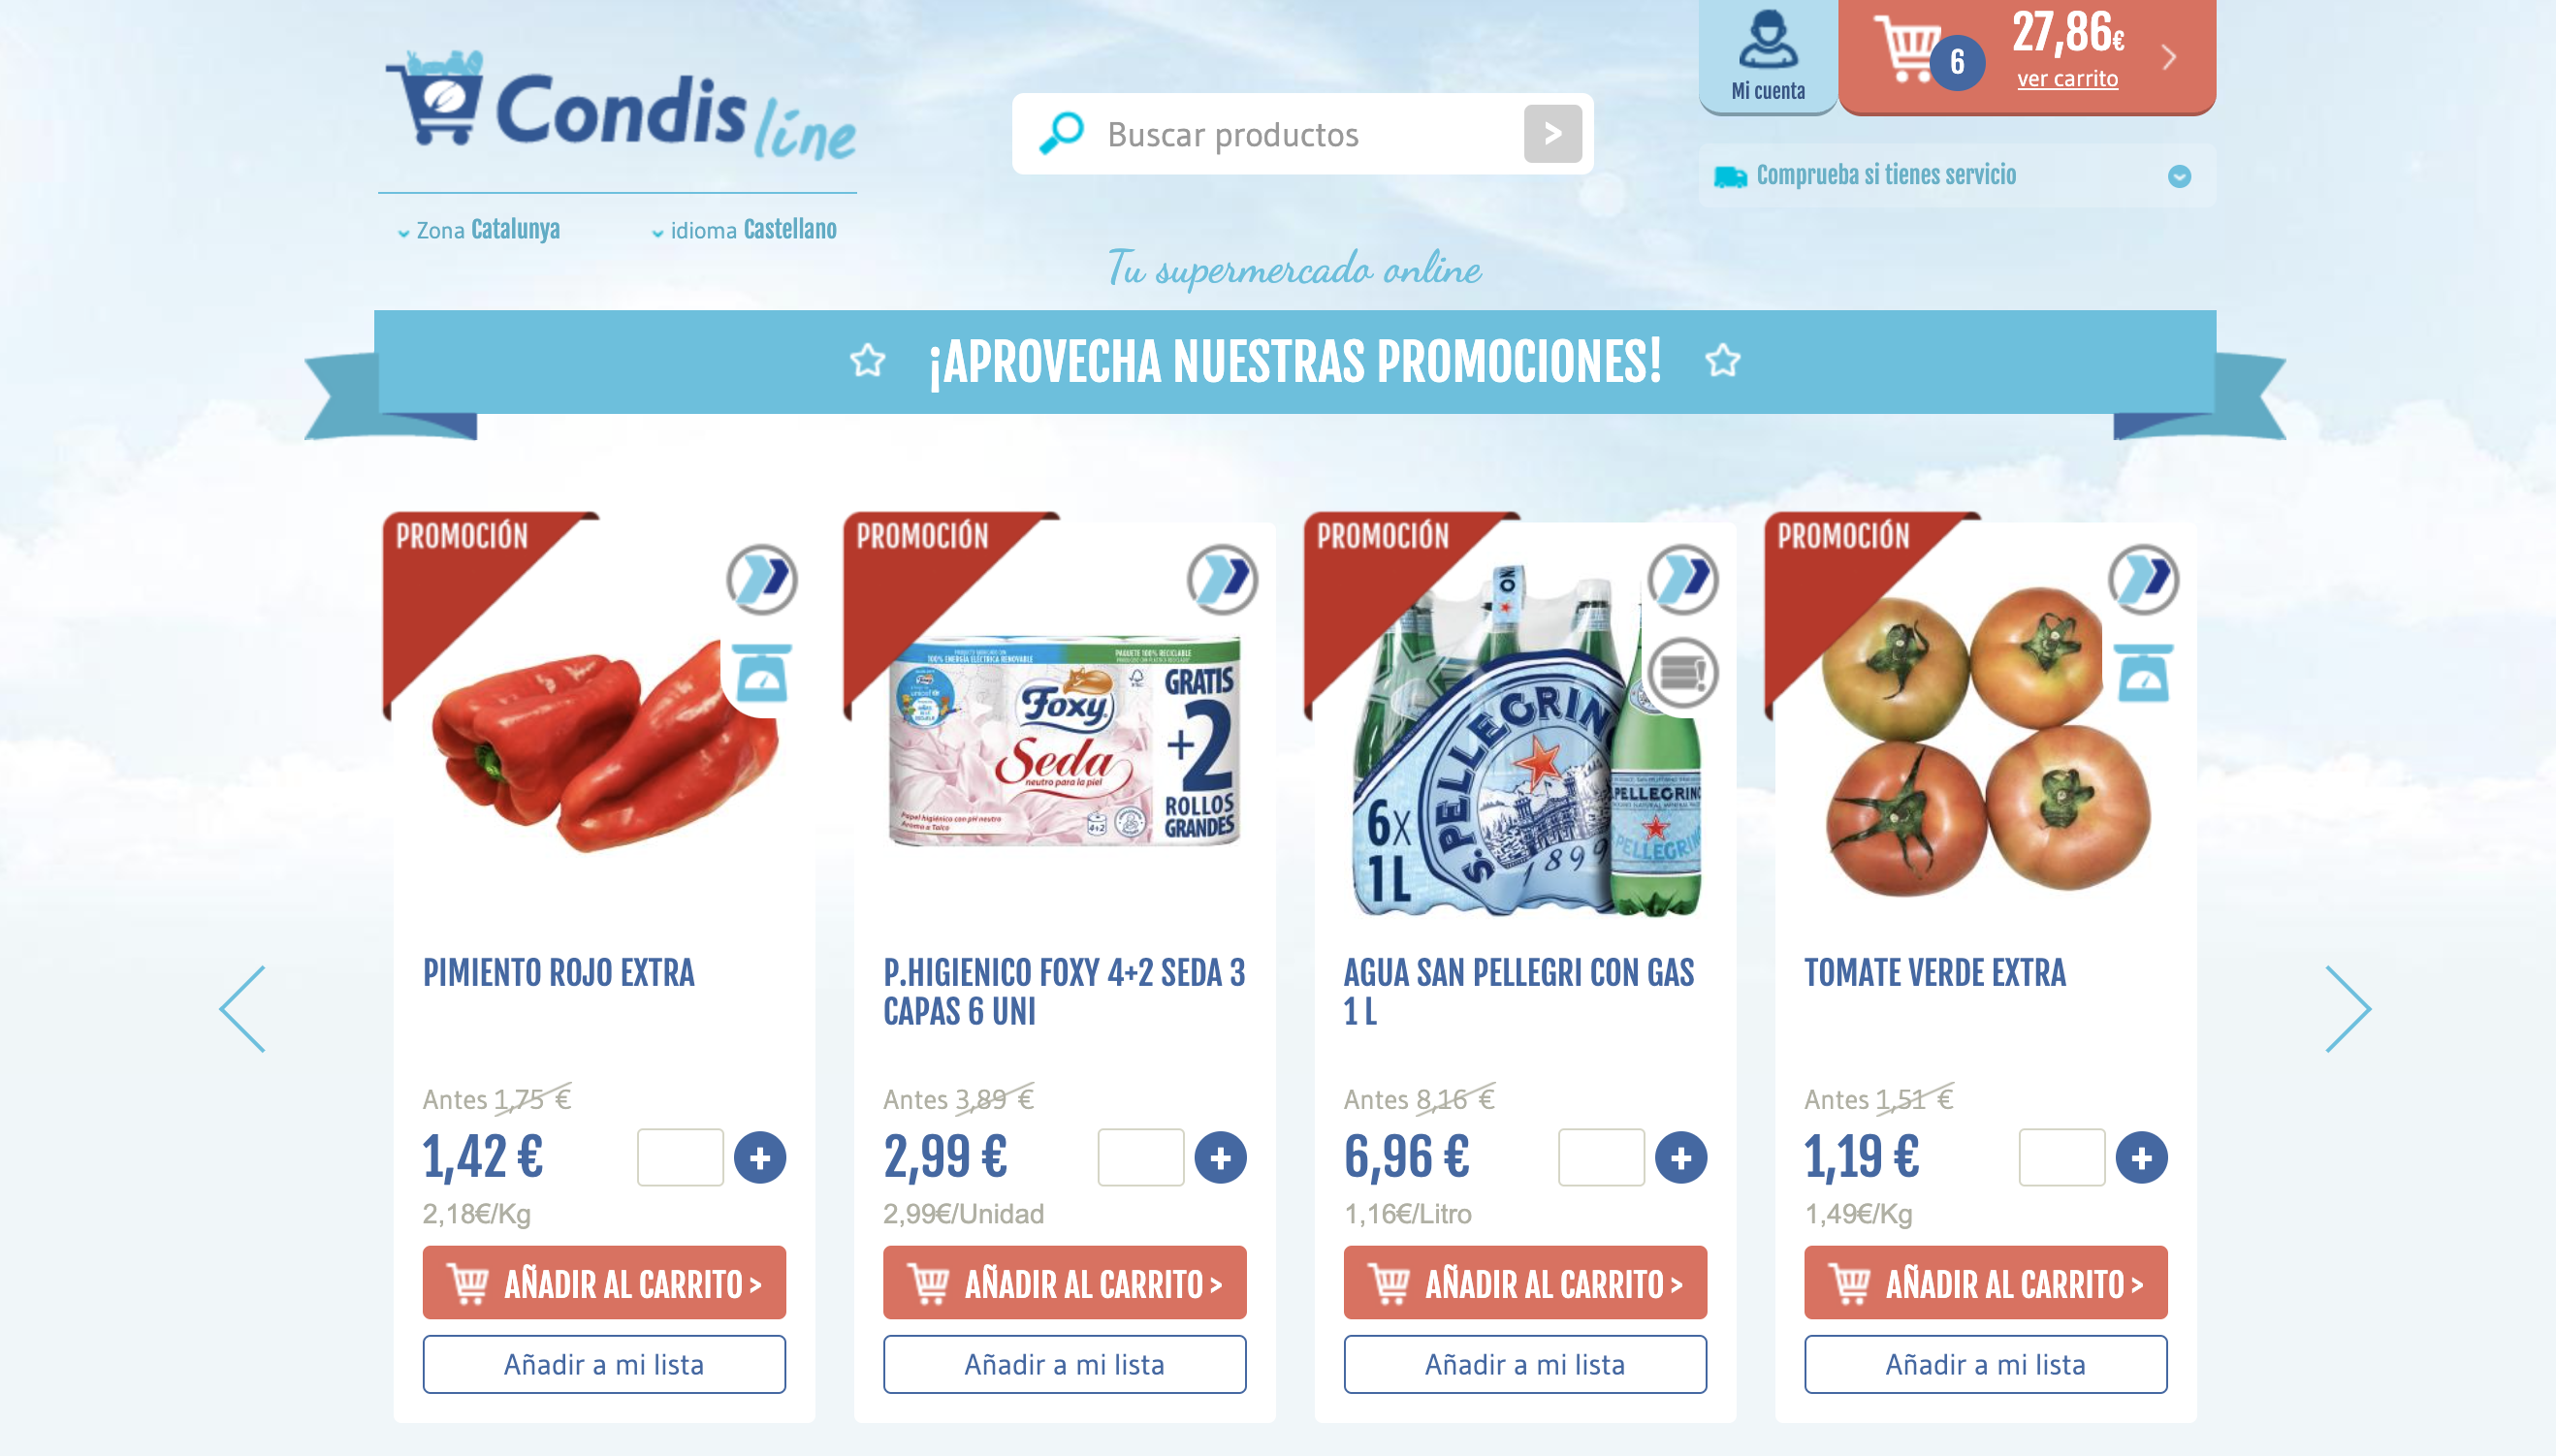
One of the main advantages of the Pleasepoint HTML SDK is its ability to display highly personalized product recommendations on your website. These recommendations are based on the behavior and individual preferences of each customer.
We recommend using the HTML version when the backend has all the necessary information for recommendations and/or event registration. Remember that you can combine HTML and JS without adding any additional JS files.
If you're unfamiliar with the Pleasepoint SDK, we recommend reading this introductory post first.
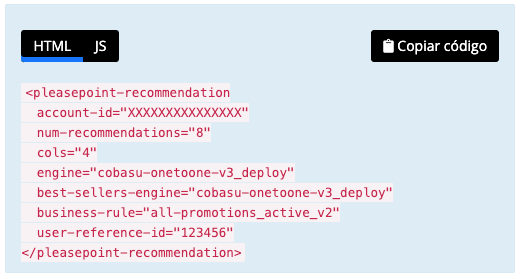
To facilitate the use of the SDK in HTML, you can configure your recommendation widget in the Module Builder section under the One-to-One module.
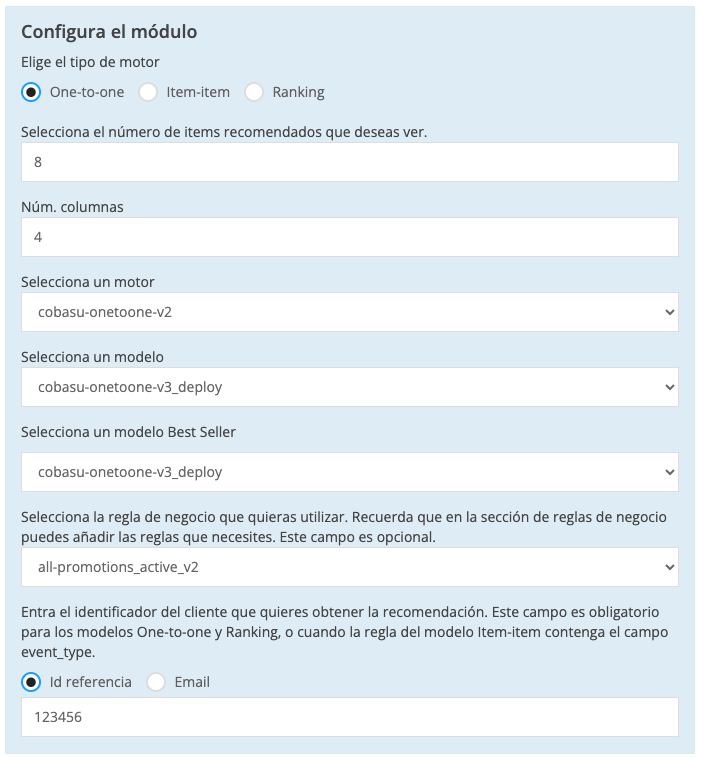
You can directly obtain the code that you should paste wherever you want to display the recommendation. Just remember to update the user, session, and product identifiers as needed.
Why is this important? When customers see products tailored to their tastes and needs, they are more likely to make a purchase. Below, we’ll go through the steps to use the Pleasepoint HTML SDK on your eCommerce site.
1. Adding the Pleasepoint SDK to the JS scripts loaded by the page.
This is the script you need to add before the closing body tag on your eCommerce site. You need to embed this script on every page.
<script type="module" src="https://platform.pleasepoint.com/pleasepoint-widgets/index.js"></script>2. Displaying one-to-one product recommendations.
Here are the links on how to use one-to-one product recommendations:
- Using the default parameters of the one-to-one product recommendation widget.
- Using the specific parameters of the one-to-one product recommendation widget.
This is the HTML code you should embed in the space where you want to display the one-to-one recommendation.
<pleasepoint-recommendation
  account-id="my_account_id"
  num-recommendations="4"
  cols="2"
  show-slider <!-- optional, default false -->
  engine="" <!-- remove to use best-sellers engine only -->
  best-sellers-engine=""
  business-rule=""
  business-rule-params='{"param1": ["value1", "value2"]}' <!-- optional -->
  user-reference-id="" <!-- OR --> email=""
  session-id=""
  event-source-page=""
  event-source-block="" <!-- optional -->
></pleasepoint-recommendation>
Remember to adjust the parameters according to your Pleasepoint account, the widget configuration, and the user and session identification.
3. Displaying product recommendations based on another product (item-item).
Here are the links on how to use item-item product recommendations:
- Using the default parameters of the item-item product recommendation widget.
- Using the specific parameters of the item-item product recommendation widget.
This is the HTML code you should embed in the space where you want to display the item-item recommendation.
<pleasepoint-recommendation
  account-id="my_account_id"
  num-recommendations="4"
  cols="2"
  show-slider <!-- optional, default false -->
  item-item-engine=""
  business-rule=""
  business-rule-params='{"param1": ["value1", "value2"]}' <!-- optional -->
  product-reference-id=""
  user-reference-id="" <!-- OR --> email="" <!-- both optional -->
  session-id="" <!-- optional -->
  event-source-page=""
  event-source-block="" <!-- optional -->
></pleasepoint-recommendation>
Remember to adjust the parameters according to your Pleasepoint account, the widget configuration, and the product, user, and session identification.
4. Displaying product recommendations based on ranking one-to-one.
Here are the links on how to use one-to-one product ranking recommendations:
- Using the default parameters of the one-to-one product ranking recommendation widget.
- Using the specific parameters of the one-to-one product ranking recommendation widget.
This is the HTML code you should embed in the space where you want to display the ranking one-to-one recommendation.
<pleasepoint-recommendation
  account-id="my_account_id"
  num-recommendations="4"
  cols="2"
  show-slider <!-- optional, default false -->
  ranking-engine="product_id_1, product_id_2, product_id_3, ..."
  business-rule=""
  business-rule-params='{"param1": ["value1", "value2"]}' <!-- optional -->
  user-reference-id="" <!-- OR --> email=""
  session-id=""
  product-list=""
  event-source-page=""
  event-source-block="" <!-- optional -->
></pleasepoint-recommendation>
Remember to adjust the parameters according to your Pleasepoint account, the widget configuration, and the user and session identification.
5. Displaying bestseller recommendations.
Here are the links on how to use product recommendations based on bestsellers:
- Using the default parameters of the bestseller product recommendation widget.
- Using the specific parameters of the bestseller product recommendation widget.
This is the HTML code you should embed in the space where you want to display the one-to-one recommendation.
<pleasepoint-recommendation
  account-id="my_account_id"
  num-recommendations="4"
  cols="2"
  show-slider <!-- optional, default false -->
  best-sellers-engine=""
  business-rule=""
  business-rule-params='{"param1": ["value1", "value2"]}' <!-- optional -->
  user-reference-id="" <!-- OR --> email=""
  session-id=""
  event-source-page=""
  event-source-block="" <!-- optional -->
></pleasepoint-recommendation>
Remember to adjust the parameters according to your Pleasepoint account, the widget configuration, and the user and session identification.
6. Recording interaction events.
Here is the link to see the description of the parameters for recording interaction events.
This is the HTML code you should embed to record interaction events.
<pleasepoint-event
  account-id="my_account_id"
  api-id="my_tracking_id"
  product-reference-id="['product_reference_id1', 'product_reference_id2', ...]"
  user-reference-id="" <!-- OR --> email=""
  session-id=""
  event-type="impression | click | add_to_cart | purchase"
  source=""
  recommendation-id="recommendation_id" <!-- optional -->
></pleasepoint-event>
Remember to adjust the parameters according to your Pleasepoint account, the user identification, session, products being interacted with, and the type of event.
Why should you personalize your eCommerce one-to-one with the HTML SDK?
The Pleasepoint HTML SDK is very practical whenever you have all the information available when generating the HTML. The key information you need access to includes:
- User ID or email and session ID.
- IDs of the products the user is viewing or interacting with.
Download our eBook Introduction to One-to-One Marketing and learn how to execute a hyper-personalized strategy based on the lifecycle and preferences of each of your customers. It has never been easier to start hyper-personalizing and increasing the performance of your marketing actions.